
Hi Eric, your site is ready for you to take ownership of and edit it as you wish. The site is now hosted on GitHub Pages of the lefolio.md account:
https://github.com/lefolio/eric-salo-design
This tutorial will help you:
- transfer the site to your account on GitHub
- set up your tools on your computer so you can start editing content
- learn the basics of configuration with lefolio.md
- publish changes
- optionally change your URL.
Hope it goes smoothly for you! It's a bit of work, but you do it only once!
🧑💻 Feel free to take breaks and take it piece by piece; it's not very complex, but there's a bunch of new tools and concepts to learn, so it takes some time.
Step 1: Take ownership of the code repository on GitHub
You first need to transfer the ownership to your GitHub account:
- Connect to GitHub
- Accept the ownership transfer for the site repository
- Navigate to the newly created repository in your account: https://github.com/ericsalodesign/eric-salo-design
- Click Settings on the top right.
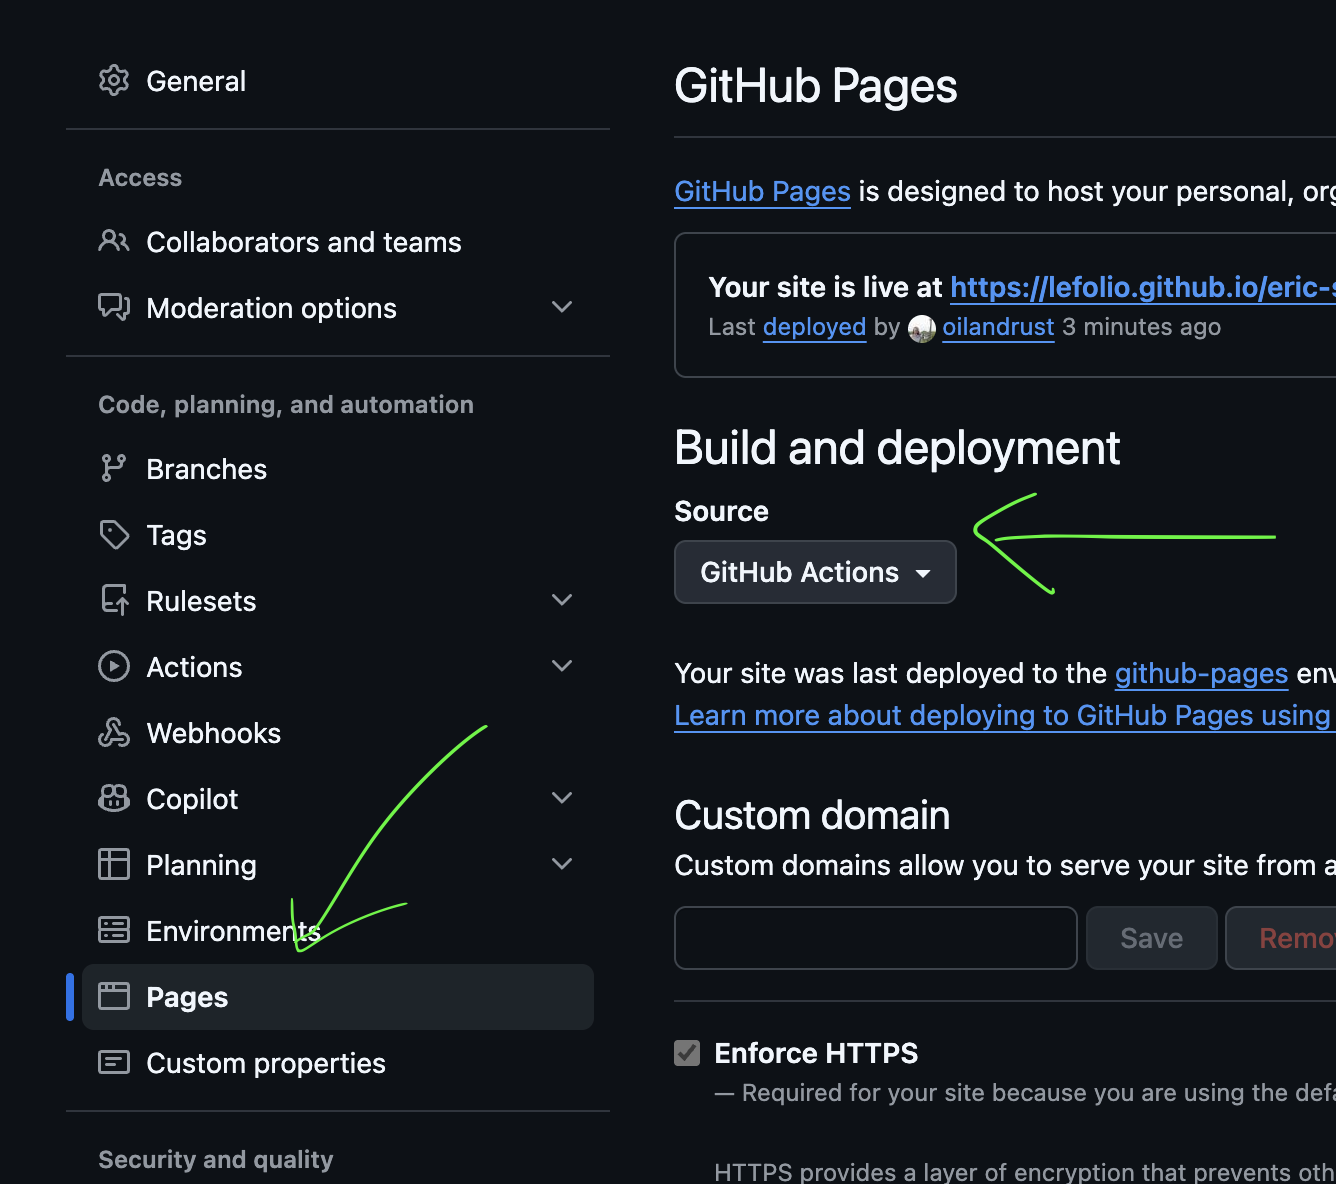
- Navigate to Pages, click
Enable Pages, and chooseGitHub Actionsin Build and deployment
✅ Your page should be live at https://ericsalodesign.github.io/eric-salo-design
Step 2: Download the code and content on your Computer
This is the scariest part since it involves Git and potentially a terminal, but I try to make it as easy as possible:
- If you haven't installed Git on your machine, do it now: https://git-scm.com/
- Download and install GitHub Desktop; this will allow you to use Git without struggling with a terminal.
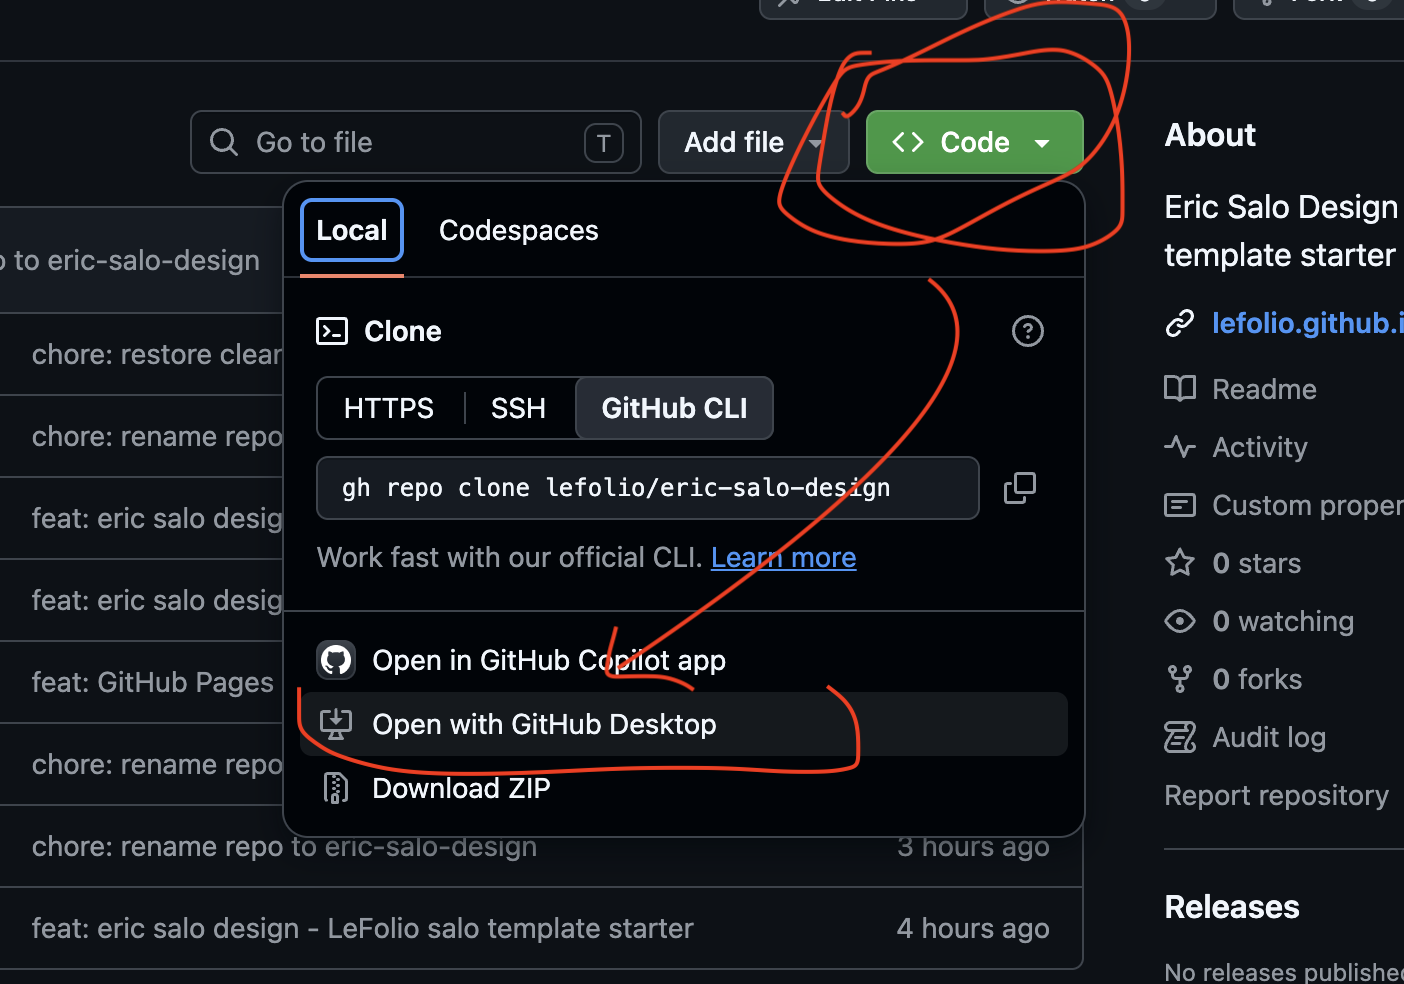
- Go to the repository's page and click the green Code button.
- Choose the "Open With GitHub Desktop" option.
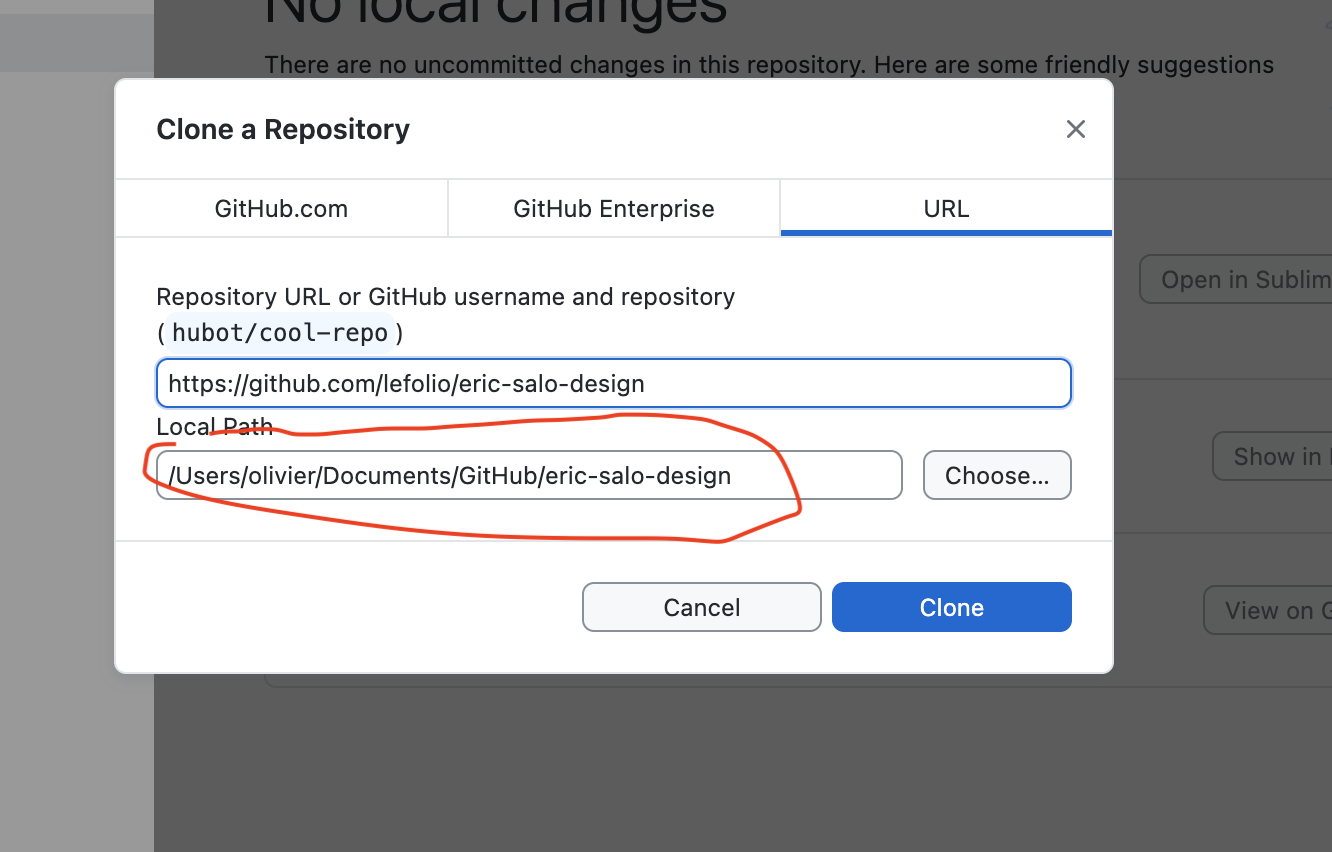
- Follow the instructions from the app, and choose where you want to clone the code and content.
- Once it's done, click Show in Explorer to see the files where you wanted to put them.
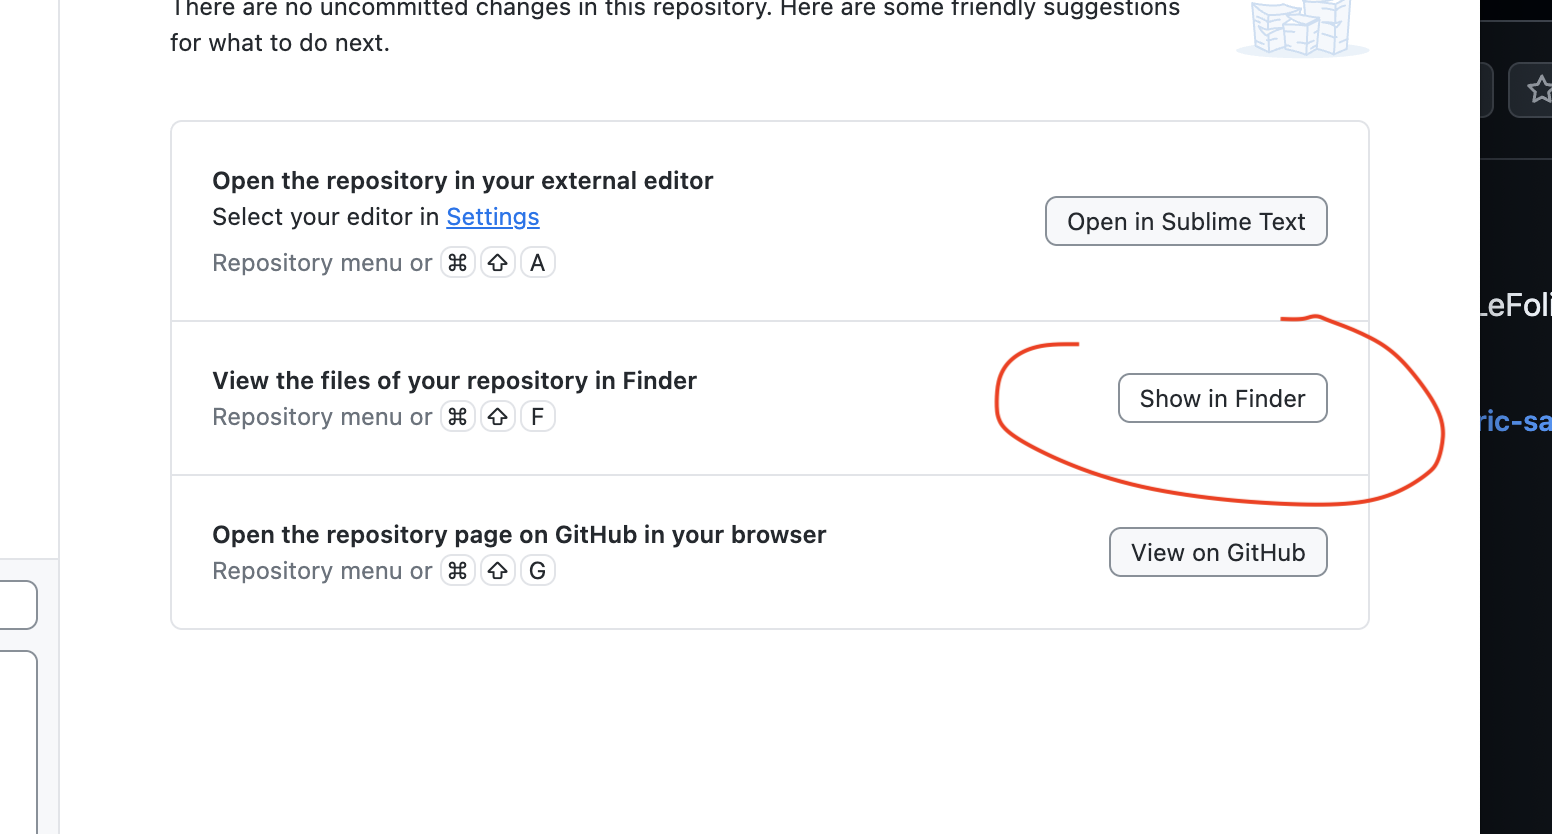
✅ Congratulations, the code and content are on your computer and synced with GitHub!
Step 3: Set up your Obsidian Environment and start editing!
This is where the fun stuff starts! Just a few more tools to install before you can start playing.
- Install Obsidian
- Start Obsidian and choose Open Vault
- Choose the Open Folder as Vault
- Choose the folder where you previously cloned the code and content.
- Watch the guided tour video to get an overview of the content and how to edit it.
✅ You have Obsidian installed with your project available and you know more about how editing works!
Step 4: Final setup with plugins (Optional but recomended)
We continue with the setup of Obsidian! Obsidian is also great because it can be extended so we can turn it into a full web editing station; this, however, requires installing a few plugins, and I'm building a plugin for Obsidian that will make things smoother, but it's still in development.
-
First, if you want to understand more, watch the short video where I explain why we use plugins.
-
Open the Obsidian Settings.
-
Navigate to Community Plugins on the left.
-
Press Enable Community Plugins.
-
You can click Browse to seach for plugins and install them, but for now you can just intall a few plugins:
-
Install and enable the BRAT plugin, that allows you to install beta plugins
-
Install the lefolio plugin through BRAT:
- In Obsidian, press
CTRL+Pto open the command panel - Type "brat add", and choose "Add a beta plugin..."
- In Obsidian, press
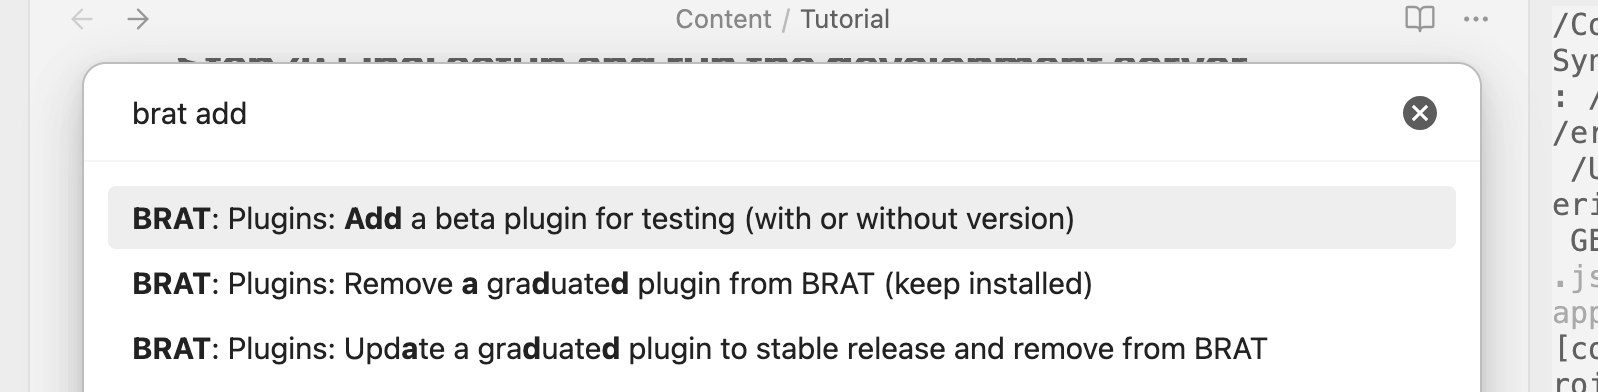
- Copy the plugin URL: https://github.com/lefolio/obsidian-plugin
- and press **Add Plugin**- Install and enable the Terminal Plugin
- Install and enable the Yaml Editor Plugin
✅ Your setup is ready for optimal comfort in Obsidian!
Step 5: Run the development server to preview your changes
This is probably the scariest part because you have to touch a terminal, at least for now. Anyway, knowing a bit about terminal is a great asset if you're gonna work with lefolio or similar tools in the future. So it's a good day to start, and it will be a small part, no worries.
- Instal Nodejs, this will allow to run the development server that uses javascript. Go to https://nodejs.org/en/download, scroll down and chose the Windows Installer (.msi) option.
- Run the installer, defaults should be just fine.
- To check that the installation you can open a terminal, open Git Bash and type
npm. If a bunch of text is printed, everything is good! - Now navigate the terminal to the location where you installed the project. If you have installed the Terminal Plugin in step 4 it will be easier, in that case, press the terminal icon on the left that says Open terminal. This will give you some choice (External or Integrated). Either is fine here, it's a mater of taste of you prefer to have it in another window or inside Obsidian, the important is that it is open at the location of the project!
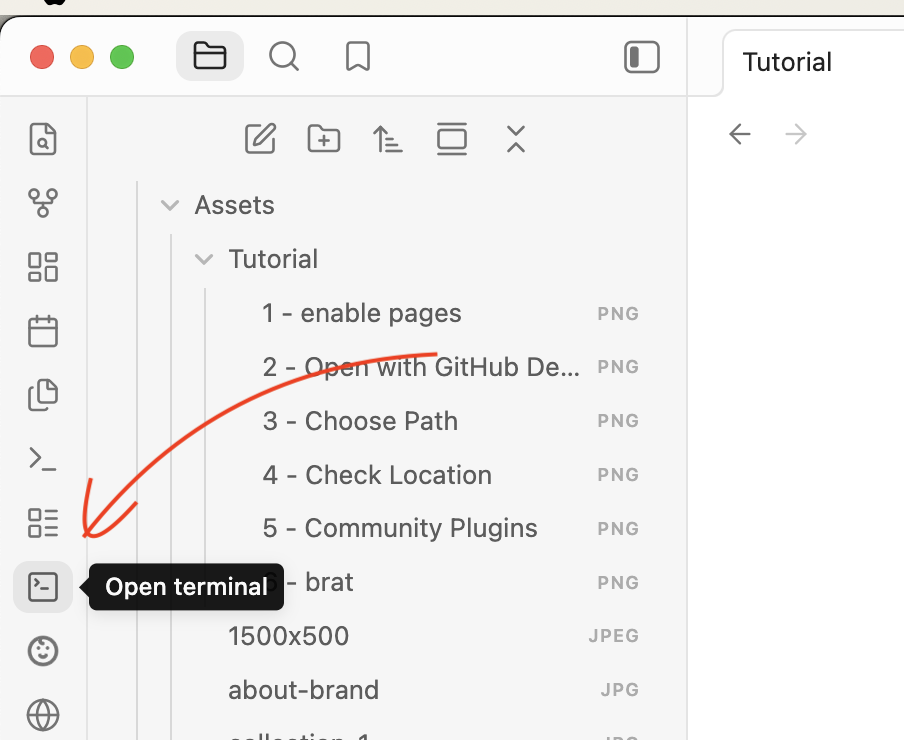
- Finaly, install the dependencies and run the server type:
npm install
I should take a while and output a bunch of text, if there is no obvious error, you can run the server:
npm run dev
Then the preview should be available on your browser:
http://localhost:3000/eric-salo-design/
✅ Congrats you're setup to edit the site and see the changes live before you publish it!
Step 6: Make and publish changes
Let's make some changes and push them to the repo to get the full experience. Suggestion: remove the Tutorial page.
To remove the Tutorial page:
- delete the Turorial file, and the images in Assets/
- Remove the line
Tutorialfromconfig.yaml
navigation:
  - Men: "https://ericsalodesign.com/pages/men"
  - Women: "https://ericsalodesign.com/pages/women"
  - New Arrivals: "https://ericsalodesign.com/collections/all"
  - Sale: "https://ericsalodesign.com/collections/all-on-sale"
  - Blog
  - Tutorial # <---- Remove this line
The Tutorial link should disapear from the site navigation if you have your preview running.
Final steps, let's push those changes to GitHub so that the site is clean without the tutorial. It's only 2 clicks away now!
(Note the tutorial is still available on the lefolio.md site!)
- Open GitHub Desktop
- You should see changes on the left, and at the bottom there is a field to type a Summary. In Git, we say Commit the changes to kind of package them with a summary, that's what we are doing here. So type for example "Removed tutorial"
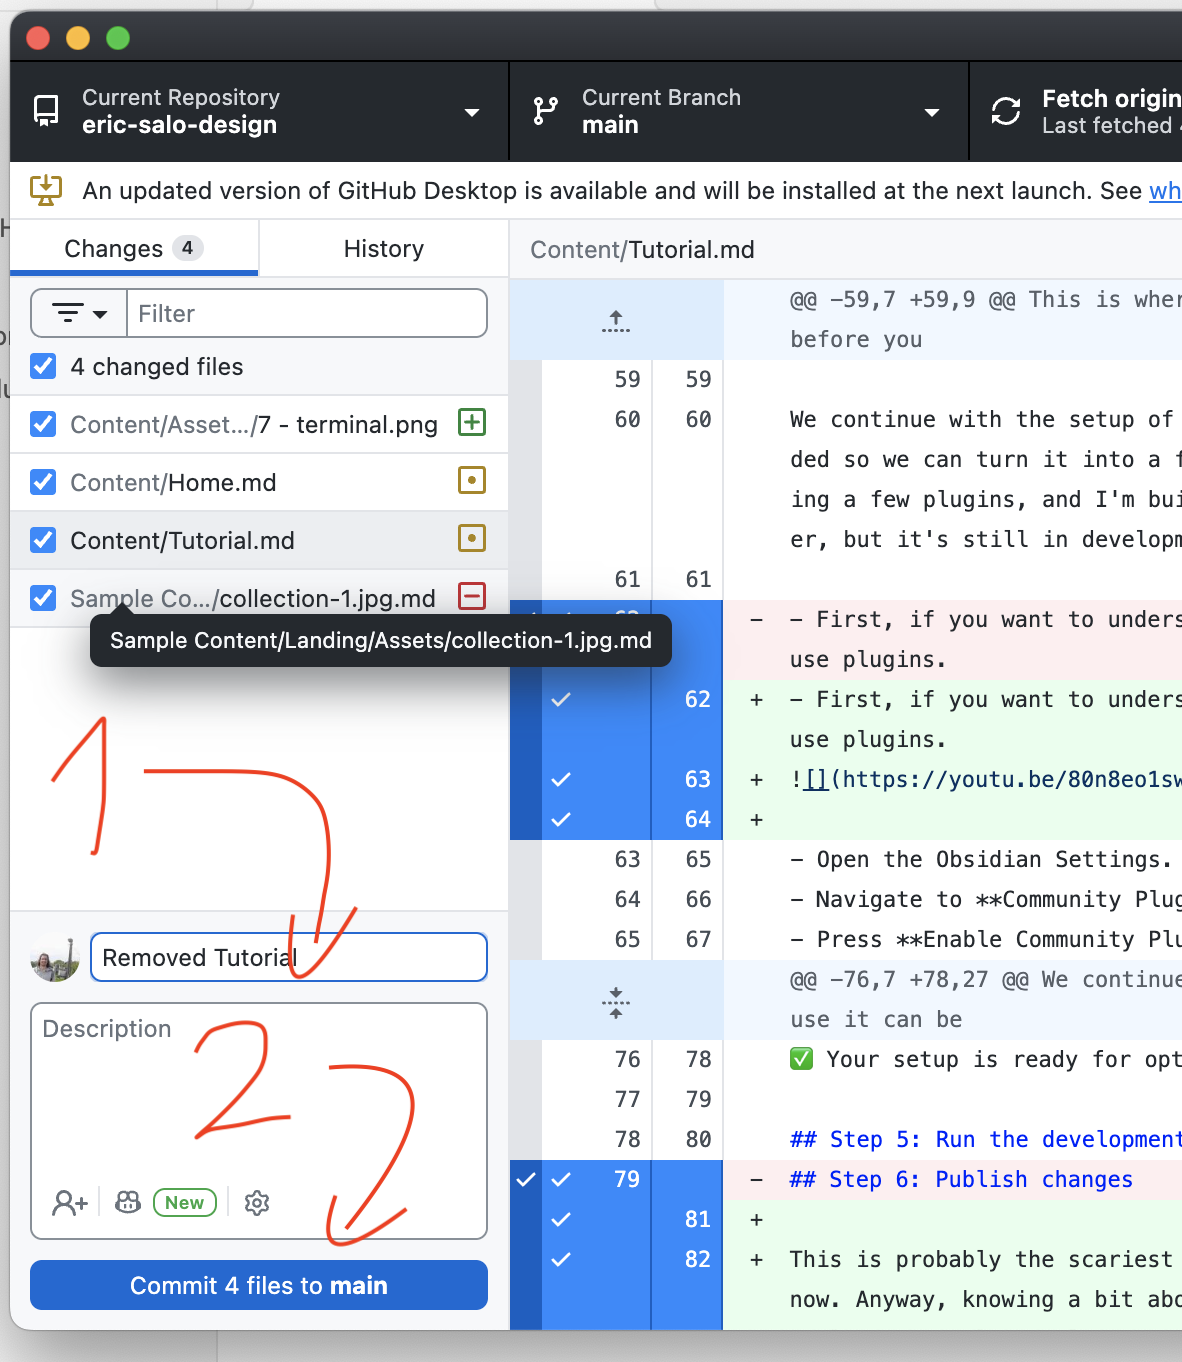
- Then press the "Commit x files to main"
- Finaly, we can Push those changes to GitHub, which will publish the changes for everyone.
- After you press Commit, you should be able to press Push origin, so go ahead and do that!
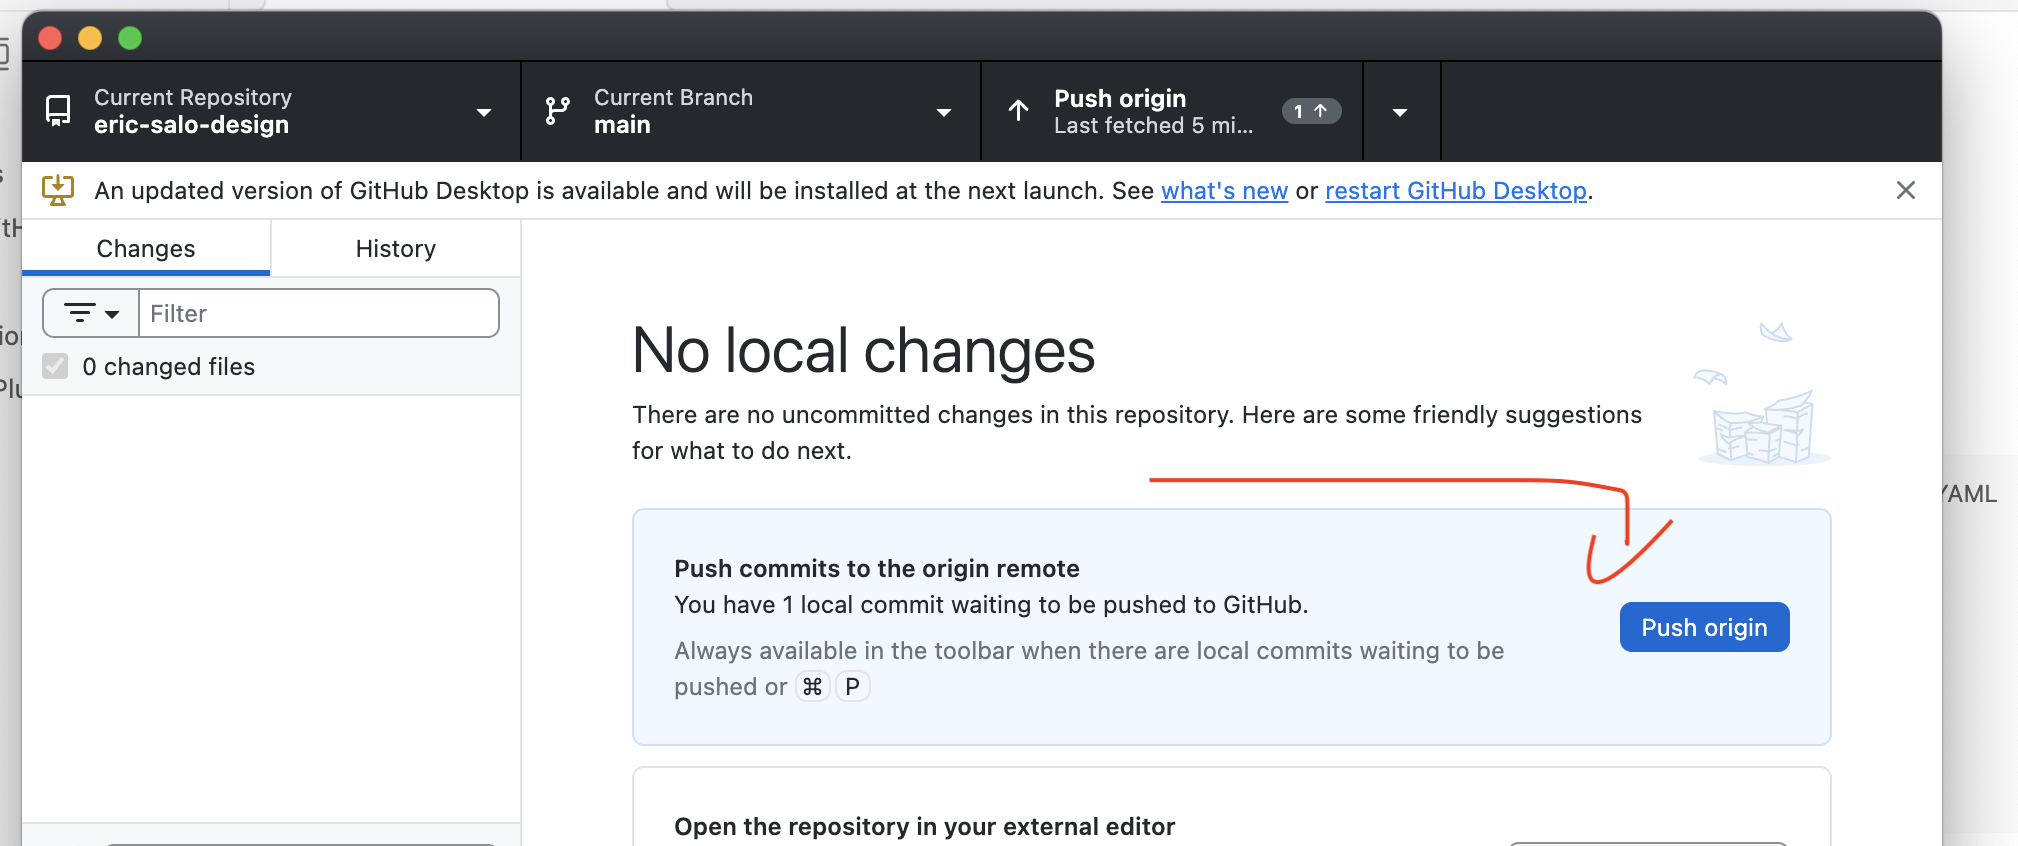
That's it! It can take a while, maybe up to two minutes before the changes are live. You can monitor the changes on GitHub, look for Actions on the page of your repository.
It should be here as well.
✅🎉🥳 Congrats you've been through the whole cycle:
- Take ownershipe of your site
- Set up your envorionment to edit the site
- Run a development Server
- Publish the changes
Now you can start playing for real, maybe add a new blog post?
Talk to you later. Olivier